Faux Tiled Headboard
Dec 27, 2013, Updated Nov 22, 2021
This post contains affiliate links. Please read our disclosure policy.
I have been slowly changing our master bedroom from a- well- frat looking room of random stuff- into a space that is comfortable, calm, and a refuge.
Oh, yea- and on a budget. Like, a razor thin budget with little wiggle room.
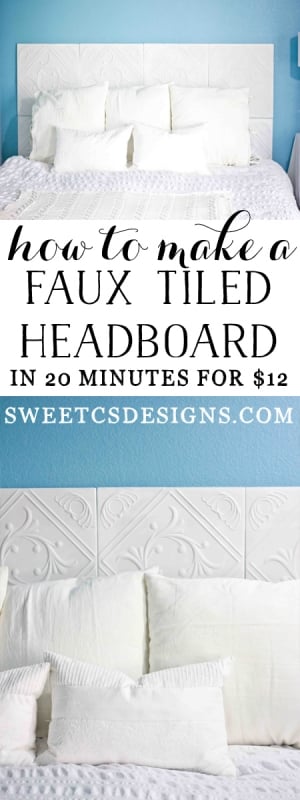
So I thought up a super fun and SO easy way to get a cute headboard in minutes- with a faux tile look. And seriously- even your kids could do this.
This Faux Tiled Headboard is the perfect solution for dorm rooms, renters, or people who would like a lightning fast mounted looking headboard that you can make without ANY DIY skills.
So, heres my secret…..
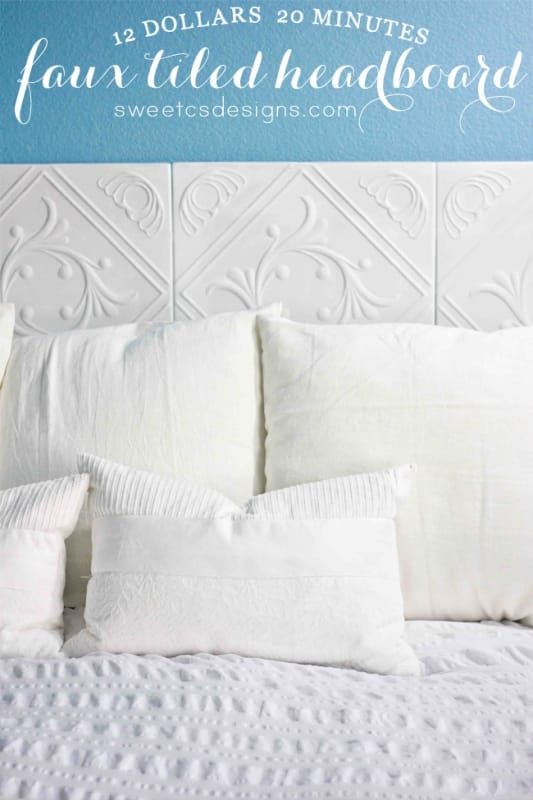
I’m using foam faux tiles!
These run anywhere from $1-$5 online, and sometimes qualify for free shipping. I happened to stumble across them on sale, so I didn’t pay shipping and buying 12 was exactly $12.
Right now they are running about $2, and include $7 shipping- so it is still very affordable.
And Scotch Mounting Tape (here’s a link for a HUGE roll- you could also use Scotch mounting squares- I used one that was $5 (though I already had it on hand, so I am not including it in the product costs- I had used it for something else and happened to have it and the Killz on hand- and it was way more than enough for 8 tiles).
I then painted them with some spare Killz (you do need to paint these as they will be slightly see-through where your adhesive is, and you can see the line very visibly without paint).
The texture of these tiles are SUPER forgiving- I just quickly slapped on a coat with a broad brush, and it looked great with just one 5 minute application.
If you’d like a faux metal look, you could spray them with hammered metal effect spray paint (it goes on beautifully), or I really like Martha Stewart’s metallic paints, though getting even brushstrokes will add time to your painting.
Let the tiles fully dry (a few hours, depending on your climate).
I then measured the center of our wall that our bed is on, and hung the tiles going outward from the center. I put a strip at the top and bottom of each tile, four across and two down.
Because our bed is in a sort of weird nook (which you will see as I reveal more of the master’s decor), I kept it with just two high. If you are on a bigger wall, it would look nice to have a few more and mimic the size of a bigger headboard- but it was just too busy in our small space.
The entire project took about 25 minutes of active time. Next time, I might mount them on a large painted board (or even a few foam boards joined together) so that could be mounted instead of individual tiles- that would make it portable.
But for now, this works beautifully to transition us until we have more time to build a more permanent headboard, or until I find one I really love that is in our budget.
I did mess up in one part and had to move the tile- well, these tiles are SUPER thin. So if you aren’t mounting this on something, know the tile might tear.
Luckily I bought a few extras (at $2, that’s totally doable), so I had no issues. The mounting strip came off just fine without damaging my wall- but you should always spot test it on your walls in an area that isn’t very visible- just in case (and especially if you are a renter!!).
Also, while it isnt necessary per se, I think using Killz was a good choice, because there is absolutely no styrofoam smell. I also let these sit out a while and air out- they didn’t have a very noticeable smell, but I hate the way styrofoam smells, and with your head so close to it, I wanted to be sure.
The Killz did a fabulous job. If you use something like a gilding, you’d want them to air out for a while and possibly seal with something- hence my thoughts that spraypaint would be a better option for a metallic look.
Click here to buy the tiles!
Wouldn’t this look AMAZING in a dorm room?? Most dorms allow command strips and other Scotch/3m products, so you wouldn’t be breaking any rules. And if your walls are brick (like mine all were) it would be really easy to hang!
The last thing we need? A new mattress. See how it’s sagging on the sides?
Yea- I am not a fan of euro top mattresses. They just don’t last. The whole reason my decor budget is small because we can’t seem to find a mattress we love (this is our second in just over 4 years), and dang it, those things are like mortgage payments! I digress…
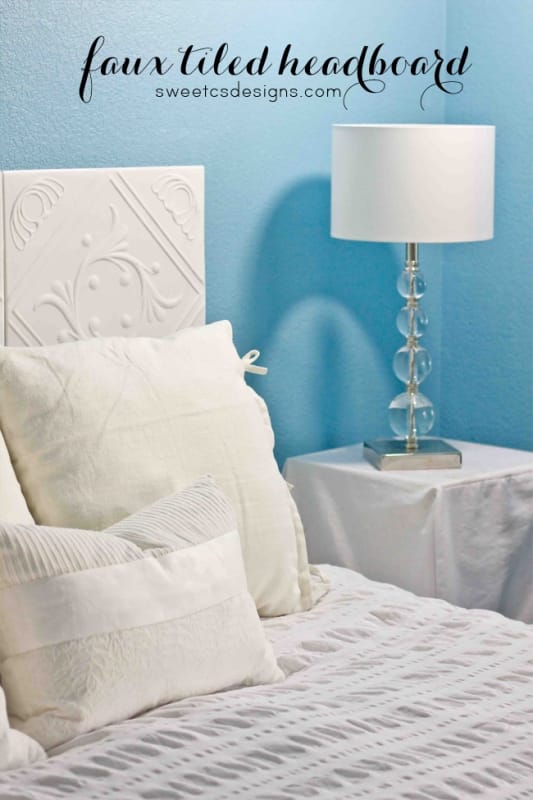
I love the way our room is coming together- it’s so comfortable and serene!
The seersucker duvet is from Target, the large and small pillows from IKEA (and totally for show), and the amazingly gorgeous lamp is also from IKEA (I searched for it and couldn’t find it on the site- I literally ran into it in my store and fell instantly in love- it was around $50).
The room is painted in Betsey Ross Blue from Valspar at Lowes. I love it so much I smile every time I walk in the room- its so vibrant and fun- and relaxing.
The sidetable cover will be featured in a fabulous tutorial soon- it’s helped us hide all our bedside books and junk for a less cluttered look- and it keeps the kids from messing with our stuff. And it is SUPER easy to make! Just a few simple lines to sew. Be sure to check in soon to see how I did it!


How easy would it be to accidentally knock a dent or hole in them? I’m not exactly the most graceful person…
I’ve had the tiles get a few tiny blemishes (kids- it’s impossible not to) but because the surface is painted it’s not super noticeable. Just looks more worn 🙂
I love this! I might be missing it- but can you tell me how many tiles you used?
Hey Katie! I used 8 for a king bed- I could really have done 10 but our bed nook area doesn’t really fit that many- it looked odd.
Hi Courtney, I saw this at the Link Party Palooza. Such a great idea and so easy too. I’ve been looking for a headboard for our master too and finding something affordable isn’t easy. I might have to give this try, thanks for sharing 🙂
Love this! Where did you buy your tiles?
I bought them on amazon- if you scroll to the bottom of the post I have a link. I am not an amazon affiliate- so it’s not an affiliate link- just a place I found.
Okay great. …thanks so much!
I must be missing the link too. I can’t seem to find it.
I bolded it so it’s easier to see. It’s right under the photo with the lamp. I’ll add it again at the bottom, too! Such an amazing deal… I can’t help but shout it from the rooftops!
Ok, I love this. LOVE LOVE LOVE this!!! I am mulling over doing my bedroom since it’s the only room in the upper two levels that has never had a makeover. I think I may just do this!!
This is an awesome idea, I’m pinning this!