This post contains affiliate links. Please read our disclosure policy.
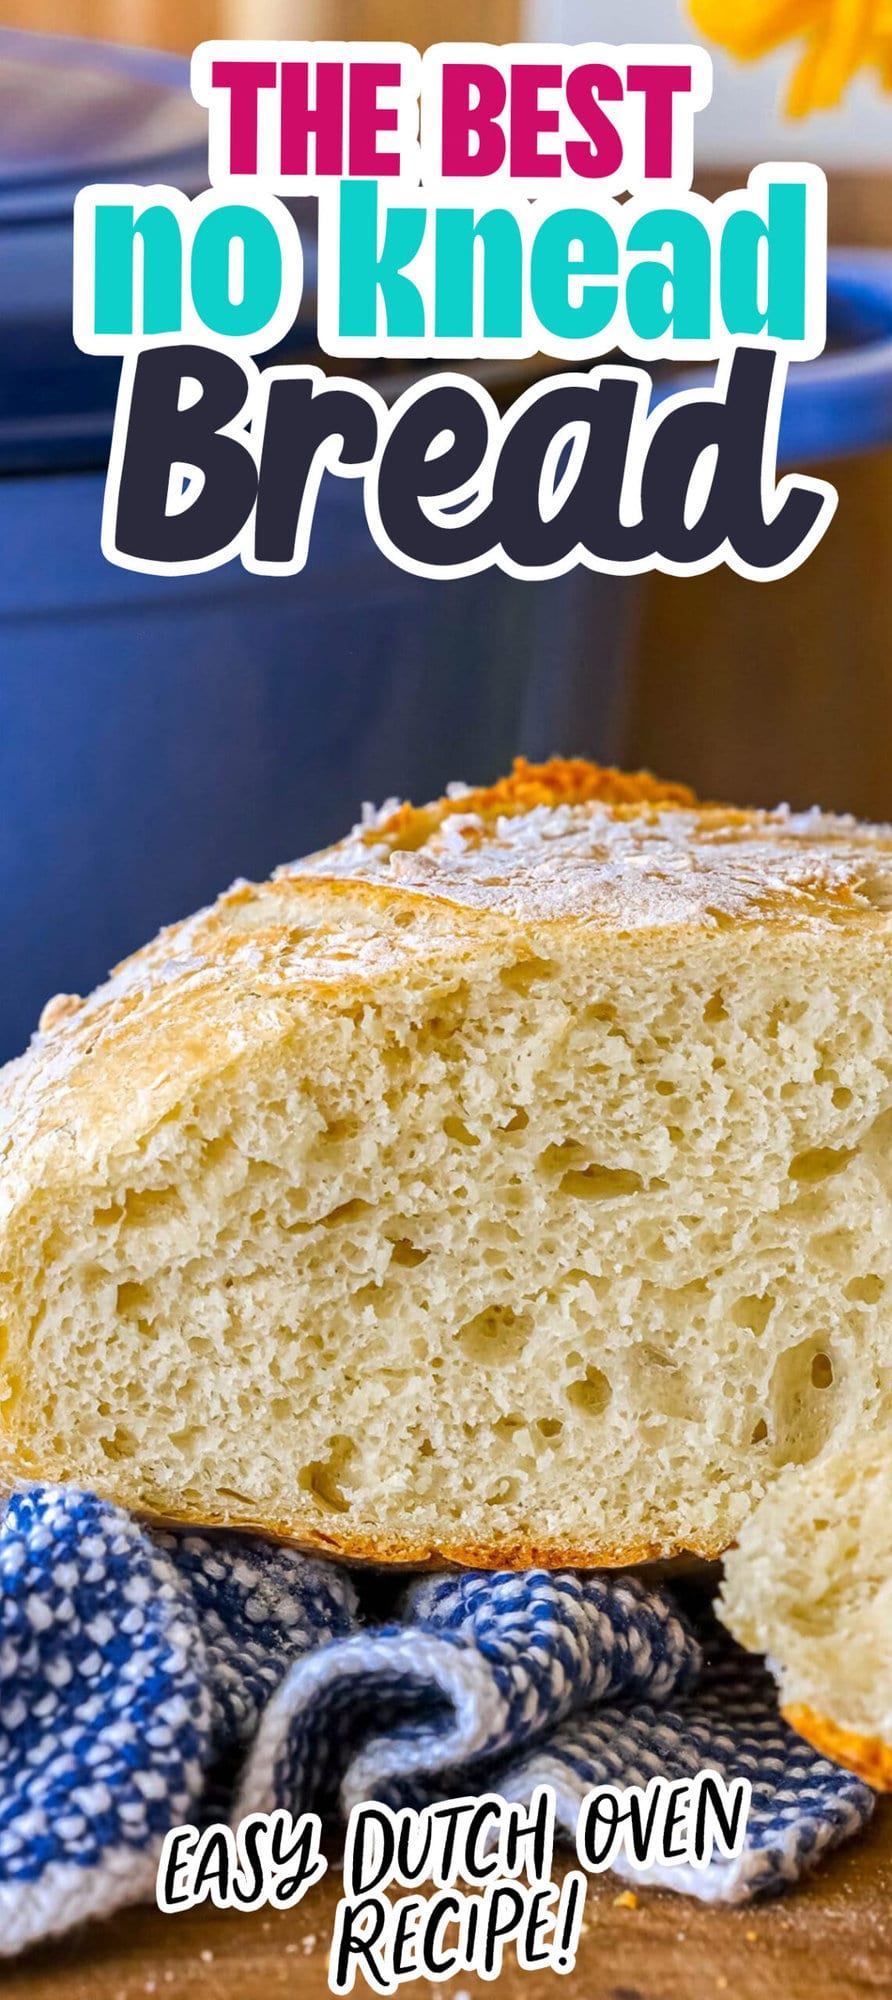
If you’ve ever wanted to bake homemade bread without the kneading, stress, or special equipment, this Easy No-Knead Bread is the recipe to try. With a simple mix-and-rest method and a golden, crackly crust, it delivers bakery-style results using just a few pantry staples. Tested to work in real kitchens, this is the kind of foolproof bread recipe you’ll come back to again and again.
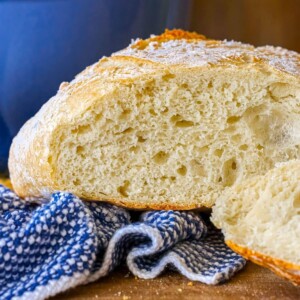
The Best Easy No Knead Bread is a simple, foolproof way to make bakery style bread at home in a dutch oven without any bread making experience or special equipment – no kneading required! Simply mix and let rise for bakery-style bread at home in no time!


Don’t want all the extras in a recipe post? We provide a skip to recipe button in the top left corner, as well as a clickable table of contents, just below, to help make this page easier to navigate.
At Sweet C’s, I add lots of tips in all of my recipes – because I am a home cook without any formal training, and I find I am more confident making dishes when I understand why it works, and what each ingredient means to the flavor of a recipe. My goal is for even the most beginner home cook to feel empowered in the kitchen.
Table of contents
How to Make The Best No-Knead Bread
This recipe is loosely based off the famous NY Times No Knead Bread recipe that was a massive hit – with some of my own flavors and modifications added. While I used rosemary (one of my absolute favorite herbs ever), you can use any herbs to make this bread your own. It’s so simple – there are so many delicious combinations you could add in!
Be sure to check out my other No Knead Bread – full of Jalapeno and Cheddar goodness!
This bread is my new favorite thing to bake on the weekends – you can even prep it the night before and let it rise. I hope you love it as much as we do!
This bread is incredibly simple to make – if you follow the steps properly, it is as easy as mix, rise, and bake.
Ingredients To Make No-Knead Bread
To make this recipe, you will need the following ingredients:
- Flour (600 grams): Flour is the primary structure-building ingredient in bread. In this recipe, it provides the bulk of the dough and contains the gluten proteins necessary for structure and texture. The flour contributes to the bread’s crumb (interior texture) and crust (exterior texture).
- Water (2 cups or 473.18 mL, lukewarm): Water hydrates the flour and activates the yeast. The temperature of the water is important because it affects the yeast’s activity. Lukewarm water encourages yeast growth without killing it. Proper hydration is crucial for gluten development, texture, and fermentation.
- Salt (1½ teaspoons): Salt enhances the flavor of the bread by controlling yeast activity and slowing down fermentation slightly. This results in a better flavor profile. Salt also strengthens the gluten structure, which improves the bread’s texture.
- Dry Active Yeast (1 envelope or 7 grams): Yeast is the microorganism responsible for leavening the bread, causing it to rise. In this recipe, dry active yeast is used. Yeast ferments the sugars in the dough, producing carbon dioxide gas, which creates air pockets in the bread, leading to a light and airy crumb.
- Celtic Sea Salt (1 tablespoon, optional): Celtic sea salt is a type of salt known for its slightly different mineral composition and potential flavor profile compared to regular table salt. When used as a topping, it can add a pleasant crunch and a hint of unique flavor to the crust. It’s optional, so you can omit it if you prefer.
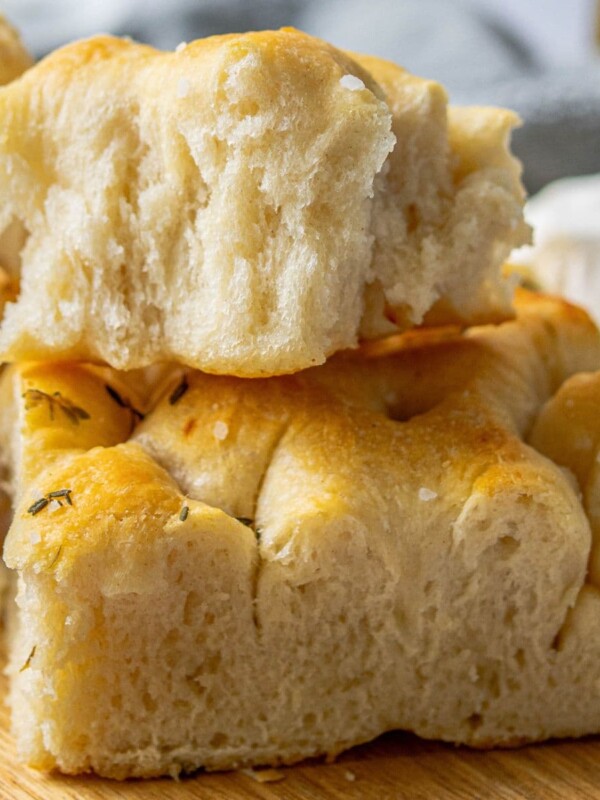
- Rosemary (2 tablespoons, optional): Rosemary, or any other herbs you choose to add, contributes flavor and aroma to the bread. In this case, it’s an optional ingredient, but it can make your bread more aromatic and flavorful.
- Herbs can be customized to your preferences, allowing you to experiment with different flavors.


Steps to Make No Knead Bread
Once you’ve gathered your ingredients, we will use the following method:
Since we do need to rise – and follow the steps exactly – for the best results, we recommend reading the instructions a few times before baking.
Thankfully, this recipe is pretty forgiving as long as you let the dough rise, and make sure your oven is hot enough.


Proof Yeast
- It’s not entirely necessary, but I always “bloom” or “proof” my yeast when making this bread to make sure it’s active and going to rise.
- This step is super simple, and just takes a few minutes.
- Use warm water – lukewarm, so the yeast is encouraged to rise, but not too hot that it dies.
- Add yeast to water and let sit for five minutes – it will foam a bit to “prove” it is active.
- If your yeast doesn’t do anything, it is dead and your bread won’t rise properly, and you need to get different yeast.


Rise
- This process will involve three rise periods – twice in a bowl, and once wrapped in plastic.
- When letting your bread rise, make sure you’ve cleaned down the sides of your bowl. Bread won’t rise as well when it sticks to dirty bits on the side of the bowl.
- Cover with a damp, warm towel. Don’t let towel touch bread, and don’t let it be wet enough to drip water onto bread – but this will help bread rise.
- Let bread rise in cool area free from cold drafts.
- Don’t set bread on stovetop while oven preheats, this may start bread cooking.


Baking Bread in a Dutch Oven
- Part of why this recipe works so well is because of the dutch oven, and the way it holds in heat and helps to evenly distribute it – almost creating a steaming effect to rise the bread as it bakes.
- I’ve had a few people ask what they can use if they do not have a dutch oven. Since this bread is no-knead, it’s really relying on the heat of a very hot dutch oven to help make it light, fluffy, and airy (instead of a gummy, dense bread).
- If you don’t have a dutch oven, you could try this in another heavy pot with a lid, but I really think for the texture to be perfect, it does need the extra heat.
Tips to Perfect No Knead Bread and FAQs
Line with parchment: I find it is best to line the dutch oven with parchment paper, with a little sprinkling of flour on the bottom.
Preheat oven fully: Preheat the dutch oven at 450 F during the final 30 minute rise when the bread is wrapped in plastic wrap, with parchment in dutch oven. Preheating dutch oven helps to create very hot pot so the bread can lift and rise immediately as it goes in the oven. Don’t skip preheating. Preheating the oven really is important, it helps your bread rise and get a perfect chewy, light texture.
Use Quality Ingredients: Start with high-quality bread flour. Bread flour has a higher protein content, which helps with gluten development and a better rise. Use fresh yeast or active dry yeast that is not expired.
Measure Accurately: Use a kitchen scale to measure your ingredients accurately. Precision matters in bread making.
Adjust the Water-to-Flour Ratio: Depending on factors like humidity, flour type, and your specific environment, you may need to adjust the amount of water slightly. Start with the recipe’s recommended ratio and add a bit more water if the dough seems too dry or a bit more flour if it’s too wet.
Use Lukewarm Water: The water temperature should be around 100-110°F (37-43°C). It should feel slightly warm to the touch but not hot.
Longer Fermentation: Give your dough more time to ferment. A longer fermentation, typically 12-18 hours, develops more flavor and a better crumb structure.
Properly Mix and Fold: Mix the ingredients until just combined. Overmixing can lead to a denser bread. Use a bowl scraper or your hands to fold the dough over itself several times during the initial mixing phase. This helps develop gluten without kneading.
Cover and Rest: After mixing, cover the bowl with plastic wrap or a damp kitchen towel and let it rest for 15-30 minutes. This allows the gluten to relax and makes the dough easier to handle.
Proper Shaping: Shape the dough into a round ball or oval shape by gently folding it over onto itself. You can use a bench scraper to help with this process. Place the shaped dough seam-side down in a well-floured or parchment paper-lined bowl or proofing basket.
Use a Hot Dutch Oven: Preheat your Dutch oven (with lid) in the oven to 450°F (230°C) for at least 30 minutes before baking. This creates a steamy environment that results in a great crust.
Score the Dough: Just before baking, use a sharp knife or a lame to make shallow cuts or a pattern on the surface of the dough. This helps the bread expand and prevents it from tearing as it bakes.
Steam the Oven: When you put the bread in the preheated Dutch oven, spray the inside with water or place a small tray of water in the oven to create steam. This helps develop a crisp crust.
Follow the Recipe: While there’s room for experimentation, especially with additional ingredients like herbs or seeds, it’s a good idea to follow the basic recipe the first few times to understand the fundamentals.
Practice Patience: Let the bread cool completely on a wire rack before slicing. Cutting into it while it’s still hot can make it gummy.
No Knead Bread Recipe FAQs
The bread will rise twice in a bowl for an hour to an hour and a half, and once wrapped tightly in plastic, for a total of three separate periods of resting.
If your yeast doesn’t foam up, even a little bit, your water may have been too hot or too cold – or you may have had expired yeast.
Water for proofing yeast should be lukewarm – warm to the touch but not hot – so it doesn’t burn yeast and stop it from proofing, which will inhibit your rise.
We find it really does make a difference in how your bread lifts and recommend baking bread in a fully preheated dutch oven so that the bread can lift as fast as possible for a light, airy crumb and crunchy, crusty outside.
No knead bread will take about 45 minutes to bake until golden brown.
Bake no knead bread at 450 degrees F.
We recommend using an enameled dutch oven or dutch oven lined with parchment paper, or another heavy pot with tight fitting lid.
We recommend a 5 qt size.
This bread can be stored in a cool, dry, place for up to two days. I prefer storing in a paper bag instead of plastic bag or it gets too soft and chewy.
Freeze bread dough after mixing, for up to four months wrapped tightly in plastic wrap.
Let thaw naturally in the refrigerator and follow rise steps in recipe below.
Other Bread Recipes You’ll Love
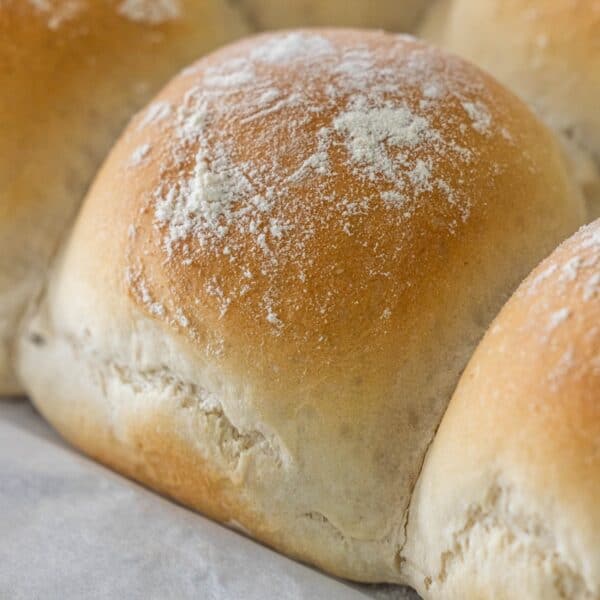
If you love this easy, effortless bread, be sure to check out my other everyday easy breads like our soft buttery dinner rolls (just like parker house rolls!), our cheddar bay biscuits, Easy Fogo De Chao Brazilian Cheese Bread Copycat rolls, no knead cheddar jalapeno bread, easy peanut butter bread, and so many more:


You can find our complete bread recipe archives here.
If you love this Easy No Knead Bread Recipe as much as I do, please write a five star review, and be sure to help me share on facebook and pinterest!
Only have 30 minutes to get dinner on the table? Sign up for my 30 minute dinner plans direct to your inbox!
Find and shop my favorite products in my Amazon storefront here!
The Best No Knead Bread Recipe
Equipment
Ingredients
- 600 grams flour, about 4 cups, lightly packed and leveled off
- 2 cups water, 473.18mL lukewarm
- 1½ teaspoons salt
- 1 envelope dry active yeast, 7g, 2 1/4 teaspoons
- 1 tbsp celtic sea salt, optional, but great sprinkled on top for extra crunch.
- 2 tbsp rosemary, or any other herb combination you like (optional)
Instructions
- In a small bowl, add water and stir yeast packet in (make sure water is warm, but not too hot – if it is too cold or too hot it will not bloom properly).
- Let yeast bloom for about 5 minutes – it will have a light foam on it.
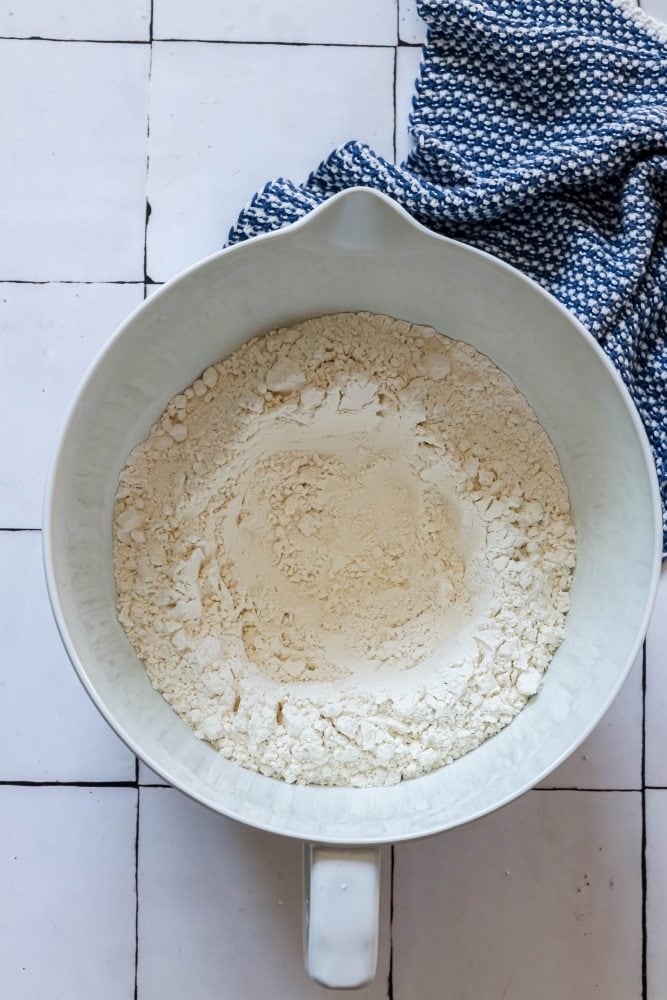
- In a large bowl, mix dry ingredients with a spoon.
- Make a small well in the middle of the dry ingredients, and when yeast is proofed, slowly pour into dry ingredients.
- Mix by hand (either with your hands, or a spoon).
- The dough will turn begin to come together and pull away from the bowl.
- If the dough is too sticky, add more flour in small increments, about 1 tablespoon at a time. If the dough is too dry, add more water, 1 tablespoon at a time.
- Once the dough has come together, cover it and let it rise until it doubles in size about 1 hour.
- Uncover the dough and give it a few pokes with your finger.
- If the dough has risen correctly, it should indent under the pressure of your fingers and slowly deflate.
- Gently scoop up the dough and make sure to remove it from the sides of the bowl (you want it to fully rise again, if it is still stuck to the sides of the bowl in parts, it won't.)
- Place back in bowl, cover, and allow the dough to continue to rise for another 1 hour.
- Preheat oven to 450 degrees (230 degrees C, gas mark 8) and add dutch oven to it, (you want it to be incredibly hot).
- Punch down dough.
- Generously flour a sheet of parchment paper; transfer dough to parchment and, with floured hands, shape into a ball.
- Place dough on parchment paper and sprinkle top lightly with flour.
- Top with any extra herbs or a sprinkle of celtic sea salt.
- Top with a sheet of plastic wrap and let rest 30 minutes.
- Remove Dutch oven from oven.
- Uncover dough and carefully transfer to Dutch oven, with or without parchment paper beneath (if bottom of Dutch oven is not coated with enamel, keep parchment paper beneath dough- I always use parchment paper because it is just the easiest and I never have to worry about anything sticking).
- Cover Dutch oven with lid and return to oven.
- Bake bread 45 minutes covered, then another 10 to 15 minutes uncovered until dough is baked through and golden brown on top.
- Cool slightly before slicing.
Video
Nutrition
Nutrition information is automatically calculated, so should only be used as an approximation.
Find our web story for this post here.


Please clarify total time.
you state total time to be
3 HOURS 45 MINUTES
but instructions state
“Once the dough has come together, cover it and let it rise until it doubles in size (about 1.5 to 2 hours).
Uncover the dough and give it a few pokes with your finger.
If the dough has risen correctly, it should indent under the pressure of your fingers and slowly deflate.
Gently scoop up the dough and make sure to remove it from the sides of the bowl (you want it to fully rise again, if it is still stuck to the sides of the bowl in parts, it won’t.)
Place back in bowl, cover, and allow the dough to continue to rise for another 1.5-2 hours.”
that is 3 to 4 hours just in rising time…
Hi there, sorry the rise time was confusing, I have recently updated this recipe but forgot to update the card. I let my dough rise for 1 hour first, another hour after “scooping” and then 30 minutes right at the end for a total of 2.5 hours of rise time. I have estimated 45 minutes for baking and another 30 minutes for blooming and bringing the dough together and cooling. I hope this helps, I have updated the recipe, thanks!
I love this bread recipe! Can you please outline the steps for doing an overnight rise? Would I put it in the refrigerator?
I am glad you love the recipe! For an overnight rise it is standard to have it rise in the refrigerator overnight for its first rise. You will need to mix the ingredients like in the recipe (making sure the yeast is activated by letting the yeast bloom/foam before mixing with the flour etc.) then place in a greased bowl in the refrigerator for about 12 hours. When you remove it from the refrigerator you will need to give it its second rise. It might take longer to rise the second time since it is coming out of a cold fridge. Hope this helps!
Hi. How tall is your dutch oven or how high does the bread rise while being baked in the oven with the lid? My dutch oven is short and wide. I’m afraid there’s not enough room for the bread to expand. Can I make it wider and flatter instead of ball shaped? Would that not work?
I really want to make it, but not sure how to proceed.
You can totally make it to shape your dutch oven – I have a 7.25 quart classic dutch oven – but making it shorter and wider won’t kill the bread 🙂
Would baking time still be the same?