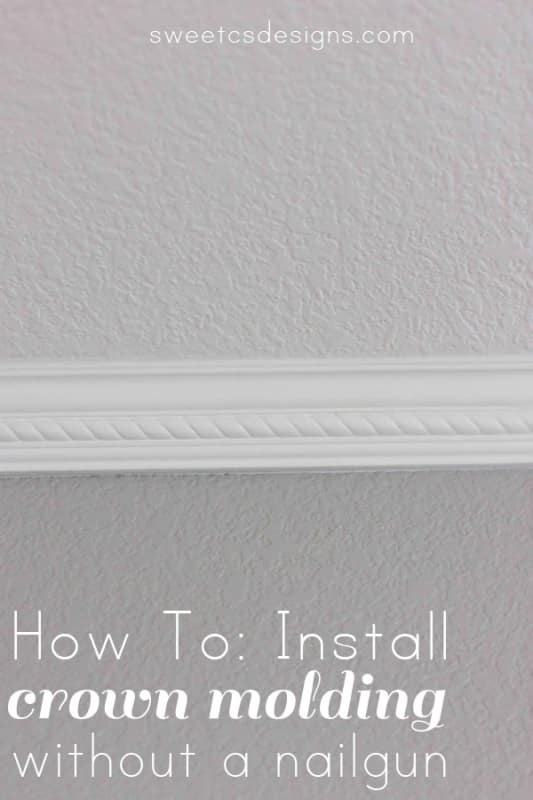
Install Crown Molding without a Nail Gun
Mar 27, 2013, Updated Feb 13, 2023
This post contains affiliate links. Please read our disclosure policy.
Who wants to use a nail gun if you don’t need to? Check out how to install crown molding without a nail gun.
We’re finishing up a big dining room renovation, and I can’t wait to show you everything because I LOVE it!
One thing I have always wanted in my house was crown molding. I think it finishes a room and makes it look so much nicer! I thought it would be really expensive or difficult to install, or need a ton of fancy tools, but it isn’t.
With some patience, a few basic skills, and a few tools you probably already have, you can install crown molding yourself- without a fancy nailgun- and make it look professional- in a few hours!
This way does require a few extra steps (a nail gun would eliminate all the work I am detailing below, minus the caulking, but we couldn’t get our hands on one, and the work around is actually REALLY EASY. I promise!).
First off, you need to measure your space, and buy molding. I went for unpainted (whats up major savings… I can paint myself for $5 less a yard!), and bought twice the amount I thought I needed. Which was super helpful unless you want a zillion seams, because mess-ups happen. Both Home Depot and Lowes have a fabulous selection of crown molding- both painted and unpainted.
First, I painted the trim with some killz to prime it. I then painted it with Clark & Kensington’s “Antique White” from Ace Hardware- that PERFECTLY matches our house’s white- and since we need to repair our dining room ceiling anyways (meaning repainting), I went for the same color on the trim so it can all be done at once.
I am into lazy solutions like that.
My dad then cut the molding for me since I am a tad awful at measuring. He cut at an angle on our mitre saw- if you don’t have one, you could ask the hardware store to pre-cut for you if you know your wall’s measurements.
I could probably have my dad write an entire book on cutting the crown molding- but instead I am going to direct you to this super helpful video we found and used: http://www.youtube.com/watch?v=vPJCXTM810U. We did have one seam in between strips of molding per wall. The seams blend in perfectly after you caulk and paint over them, so don’t worry if you can’t find a single strip of molding long enough.
My dad actually measured, cut, measured, cut, and measured each strip again. Each piece took him about 3-4 cuts to get it exactly perfect- but it is much better to cut a few times to get it right than to overcut. Take your time and measure carefully when cutting your molding, or you will have a ton of seams and four letter words!
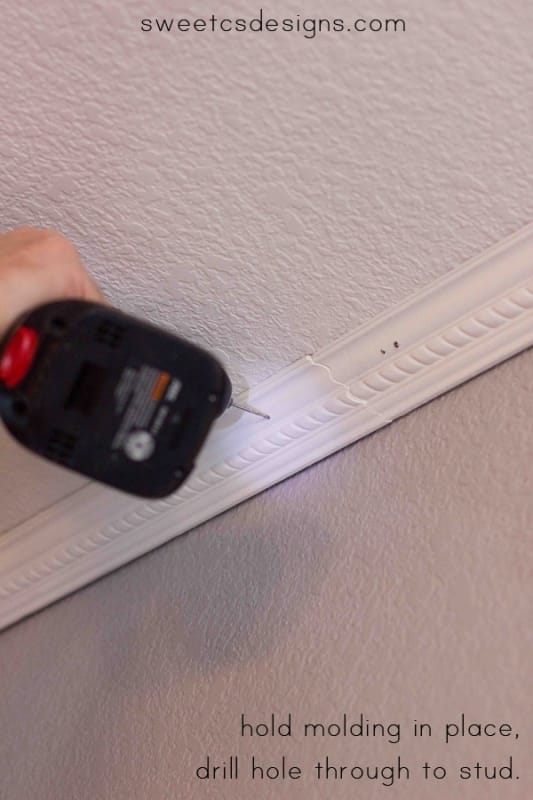
Start off by finding studs in your walls. Then hold up the molding on your walls where you would like it to go and drill a hole through them into the studs. We were lucky that our walls had a stud running along the top of the wall, so we didn’t have to worry too much about using the studfinder the whole time (what an awesome discovery THAT was!!).
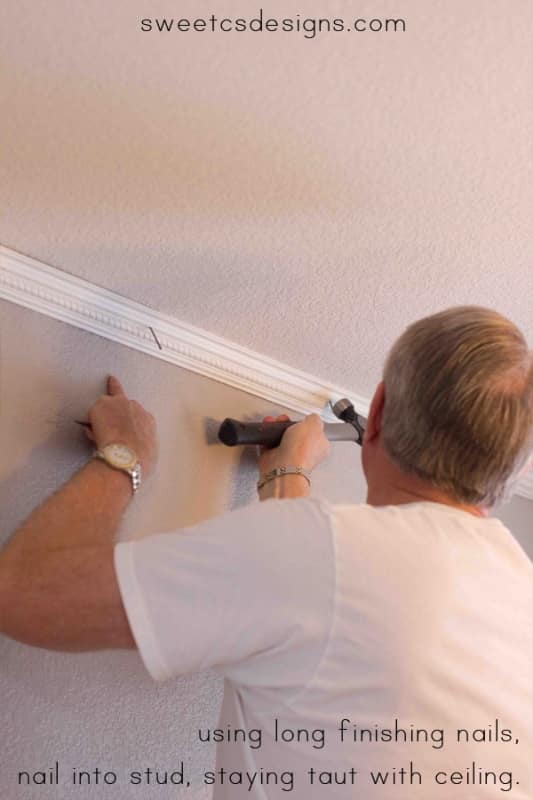
Next, using long finishing nails, nail your trim in place (lined up with the holes you previously drilled). It is crucial to have someone hold the trim in place for you and keep it taut with the wall- especially if you have uneven ceilings (or walls) like I do so it is flush against them. You don’t want any gaping bits (if we didnt watch, the molding would easily have been crooked. A lot of new construction houses have uneven ceilings!)
Don’t nail all the way in- just into the stud enough so the trim can hang, unsupported. You dont want to come too close with your hammer or you could smash, nick r ding your beautiful molding!
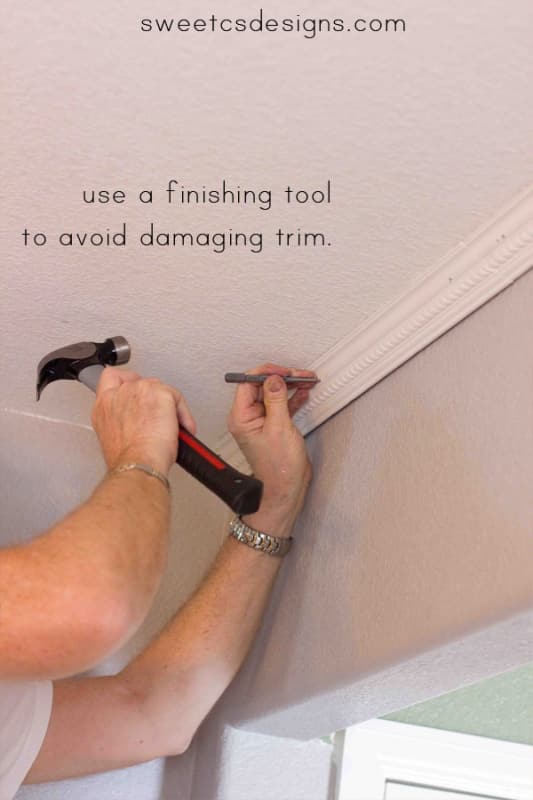
You’ll grab your finishing tool next (they are like under $5 at hardware stores- be sure to grab one with a tip that is larger than your nail heads, or it will be harder to control. Hold the finishing tool in one hand, and line it up with your nail. With your other hand, hammer the end of the finishing tool to drive your nail into the trim- nick free.
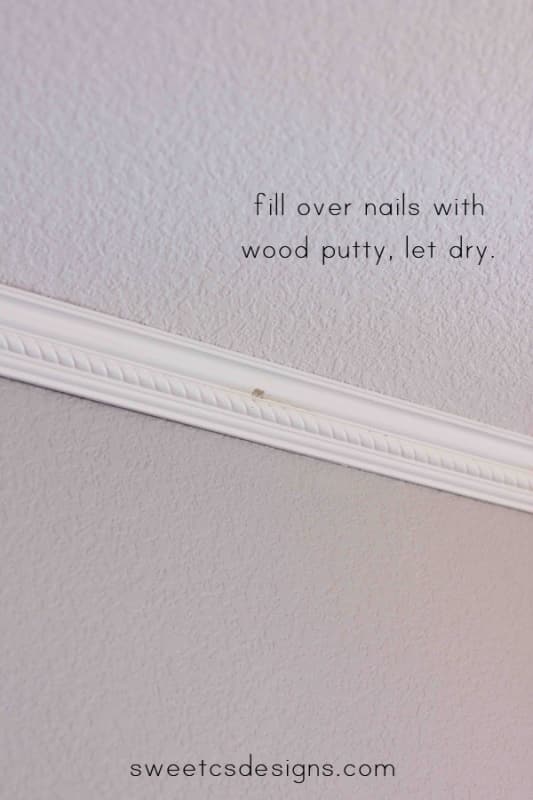
Using spackling compound or wood putty, smooth over the nails completely.
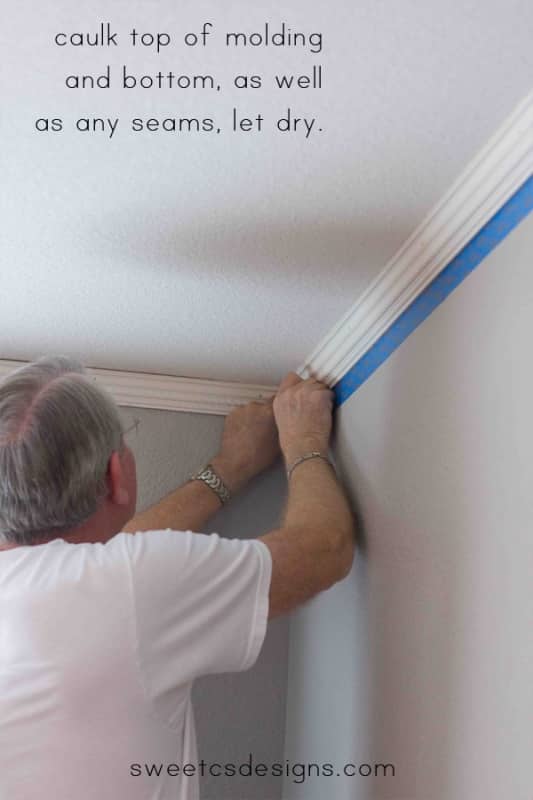
Caulk along the top and bottom of the molding. If you don’t want to repaint the wall or ceiling, tape off the area you dont want caulked. You’ll notice we only taped off under the molding since we have massive gaping holes in our ceiling and are going to have to repaint it all anyways when that gets fixed.
Let the spackle/wood putty and molding dry, and remove tape.
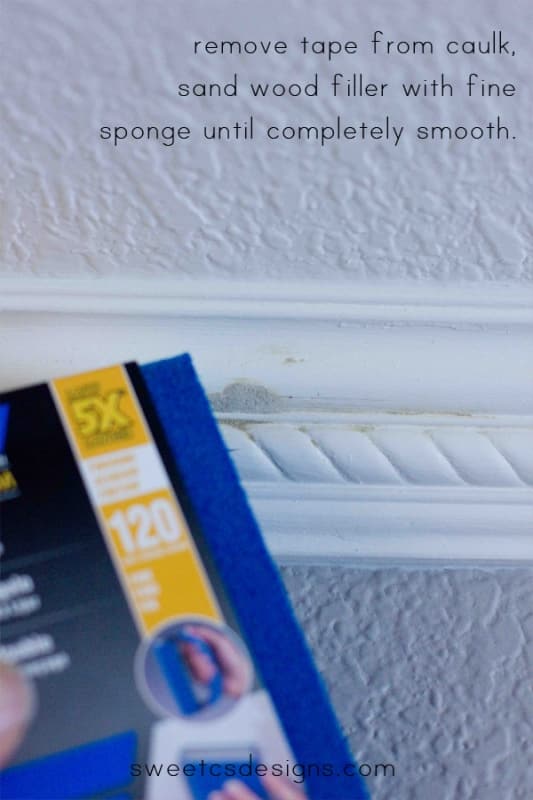
When the putty is totally dry, usually overnight, use a fine sanding block or piece of sanding paper, go over the putty and make it completely smooth with the molding.
Paint over the putty areas, and you are done!
How easy was that? It might seem like a few steps, but it really isn’t much work once you have the molding cut. Where would you most like to add crown molding?


Great job on the install. Where did you all find your “finishing tool” and is that the exact name of the item?
Dani
Great job on the crown molding install! Here’s a tip: check and see if you have any lumber yards near your home before going to the big box stores. They usually have a greater selection and better prices. Here in CA, I get crown for 1/3 the price of Depot from a local molding warehouse…
That’s an awesome tip! We did this one on a whim but the next rooms we will look around for sure!
Great job! Installing crown moulding can be a pain and kuddos to you guys without a nail gun! We just have a few rooms left to do in our home… 2 x-large rooms and our guest bedroom. My guess would be that we will do our guest bedroom first!
Good Job done. But Why would anyone took the risk of a damaged hand or finger by using traditional hammer instead of using a nail gun.
Because at the end of the day a nail gun is a good investment for every homeowner.
Did you paint all of the molding?? Looks great 🙂
Ruth- I painted it all before we installed it, then I just painted over the bits where we used wood putty after it was installed (with the same paint). Didnt have to repaint the whole thing since I used the same color- worked perfectly! thanks!