This post contains affiliate links. Please read our disclosure policy.
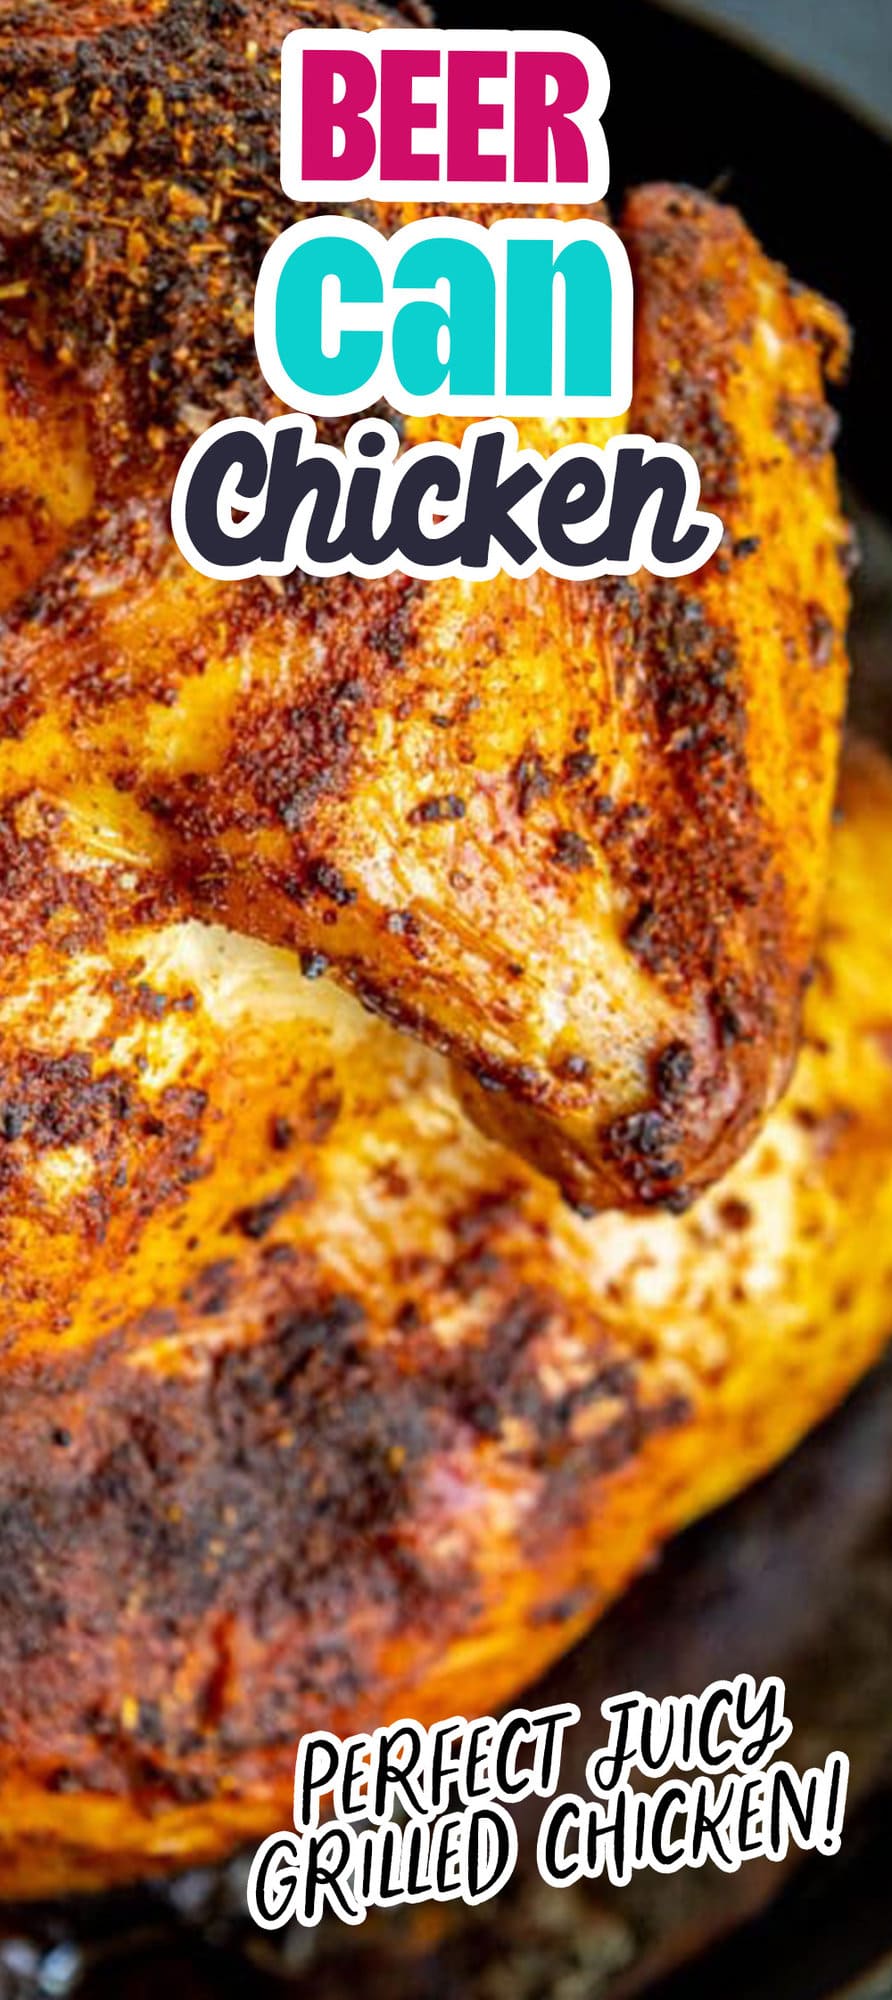
Beer can chicken might look like a party trick, but the results are dead serious – the juiciest, most evenly cooked whole chicken you’ll ever pull off a grill! The beer steams the inside while indirect heat renders the outside into my favorite part – the crispy crunchy golden skin. And yes, it really works. This is my husband’s go-to method every summer, and once you try it, you’ll understand why!
Also called beer butt chicken (yes, really), this method has been a backyard staple for decades. All it takes is a whole chicken, a can of beer, a bold homemade rub, and about 90 minutes of mostly hands-off cook time.


Don’t want all the extras in a recipe post? We provide a skip to recipe button in the top left corner, as well as a clickable table of contents, just below, to help make this page easier to navigate.
At Sweet C’s, I add lots of tips in all of my recipes – because I am a home cook without any formal training, and I find I am more confident making dishes when I understand why it works, and what each ingredient means to the flavor of a recipe. My goal is for even the most beginner home cook to feel empowered in the kitchen.
Table of contents
Why This Method Works
Here’s the science: as the grill heats up, the beer in the can steams and rises through the chicken cavity, keeping the interior moist throughout the long cook. Meanwhile, the dry rub on the exterior dries out the skin surface, allowing it to crisp up beautifully under indirect heat. The chicken essentially cooks from both inside out and outside in at the same time.
The Homemade Rub makes all the difference – skip the store-bought seasoning packets. This simple rub takes 2 minutes to mix and makes your chicken packed with flavor!
How to Make Beer Can Chicken
The key word is indirect heat. You’re not cooking over flames — you’re setting up the grill like an oven with heat on the sides, not under the bird. This is non-negotiable. Direct heat will burn the outside before the inside reaches safe temperature.
Beer Can Chicken Rub
This recipe is for a 4–5 lb whole chicken:
- 2 tablespoons smoked paprika
- 1½ teaspoons kosher salt
- 1½ teaspoons brown sugar
- 1 teaspoon garlic powder
- 1 teaspoon onion powder
- ½ teaspoon black pepper
- ¼ teaspoon cayenne pepper (adjust to taste)
Combine all in a small bowl. Rub generously over entire chicken — get under the breast skin for maximum
flavor.
Make it your own: Add 1 tsp dried thyme or dried oregano for an herbier profile. Swap smoked paprika for regular paprika + ½ tsp liquid smoke rub if you
prefer milder smoke flavor.
What Beer to Use
- Use a 12 oz can — that’s what fits the chicken cavity. As for which beer, here’s the honest truth: the flavor difference is subtle at best. The steam is more about moisture than flavor. That said:
- Lagers and pilsners (Bud Light, Miller Lite, Modelo) – mild, clean steam, great all-purpose choice
- Amber ales (Fat Tire, Yuengling) – adds slight malty depth, works beautifully
- Stouts or IPAs – strong flavors, but most cook off; fine to use if that’s what you have
- Half-full is fine – pour out (or drink) half the can before using. You want steam, not a geyser.
- Gluten-free? Skip the beer entirely. Use a can of ginger ale, lemon-lime soda, apple juice, or chicken broth. The steam method works identically – the chicken won’t know the difference.
You can use a beer can insert, or place your chicken on a sturdy, grill-safe pan (like cast iron) – this recipe is adaptable and can be made with or without specialty equipment.
Beer Can Chicken Ingredients
To make this recipe, you’ll need:
- One whole chicken – Naturally, this recipe calls for a whole chicken. For 3-4 people a young fryer should be sufficient meat, for a slightly larger crowd you might consider a whole roaster chicken. ‘Young fryers’ are 2 ½ – 4 ½ pounds and roughly 7 weeks old, while ‘whole roasters’ weighs 5lbs or more and are 8-12 weeks old. I used a young fryer for this recipe.
- Beer – I used a classic American lager for this recipe, but really any beer you like could render interesting flavors. The pairing of your beer flavor profile and seasoning is an important part of getting this recipe right, so be careful of using bold beer flavors AND bold seasonings.
- Chicken rub – Traditional chicken flavors like thyme, sage, savory, garlic powder, salt, and pepper are a great combination for this easy beer can of chicken. You can also try a host of delicious pre-made chicken rubs. For this cook, I used Dizzy Pig’s Peruvian-ish seasoning. It’s all-natural, gluten and MSG-free, and contains no tree nuts or sesame seeds. (It’s available here).
- Salt and Pepper – Salt and pepper are indispensable seasonings for any savory meal. Even if your chicken rub has some salt in it, it’s very hard to oversalt a whole chicken.
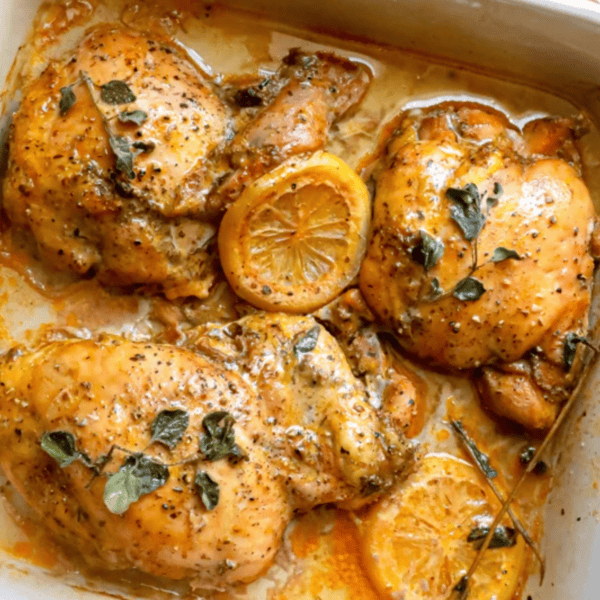
- Lemon – I like to include some aromatics in my beer can. For this recipe, I use a couple of slices of lemon.
Beer Can Chicken Method Step by Step
Once you’ve gathered your ingredients, we will use the following process:

Prepare Chicken
Remove your chicken from the packaging, rinse with cold water, and pat dry with a paper towel. Check the body cavity for a package with the giblets or the neck. Discard these parts, unless you’re planning to make chicken stock.

Prep Beer Can
Open your can of beer and pour ¼ to ½ of the can into a cup. Using a sharp knife, kitchen shears, or a can cutter, carefully cut open the top of your can. Once the top has been cut open, I put 2-3 slices of lemon and a couple of cloves of garlic in the can, and a dash or two of your chicken rub.

Position Chicken
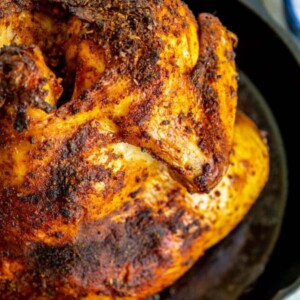
Place the opened can of beer in the middle of the cast iron skillet, then gently place the chicken over the can in the large cavity opening. The bird should sit upright over the can. Once the chicken is in place, spray with cooking oil, and then season the chicken with your rub of choice.

Cook Chicken
I cooked my chicken on our Kamado-style grill, heated to 400o F, with a few chunks of oak added to the charcoal for some smoke flavor to the chicken. Approximately every 20-30 minutes, I spritzed the chicken with a mixture of the leftover beer with some water added to thin it out. The chicken is done when it reaches an internal temperature of 165o F.

Rest Chicken
Allow your chicken to rest for 15-20 minutes to keep the meat moist. Remove from the cast iron skillet after the rest, and carve your chicken into individual cuts. Enjoy hot, or cold at a picnic or backyard BBQ.
Other Beer Can Chicken Methods
Charcoal Grill Method
- Light charcoal and arrange briquettes on both sides of the grill, leaving the center empty (this is your indirect heat zone). You want the grill temp to reach 350–375°F.
- Season chicken as above.
- Place over the empty center of the grill, upright on the beer can.
- Close the lid and adjust vents to maintain 350–375°F. Cook 60–90 minutes, checking temperature with an instant-read thermometer.
- Add 8–10 fresh briquettes to each side if your cook time runs over 60 minutes.
Kamado / Ceramic Grill Method
- Set up for indirect cooking using heat deflectors (conveggtor or plate setter). Preheat to 350–375°F.
- Season chicken as above. Stand upright on beer can on the grill grate over the heat deflector.
- Close lid and cook 60–90 minutes to 165°F internal. The ceramic holds heat beautifully — resist
opening the lid.
Oven Method
- Preheat oven to 375°F. Place a roasting pan or baking sheet on the lowest oven rack.
- Season chicken as above. Stand chicken upright on beer can inside the roasting pan (the pan catches drips).
- Roast 60–90 minutes until internal temp reaches 165°F. For crispier skin, broil on high for the last 3-5 minutes – watch closely.
Tips and Tricks to Perfect Beer Can Chicken & FAQs
Any beer will do. Don’t have classic American lager? Pilsner, IPA, and wheat beers are classic choices for this application. Regular 12oz beers or “tallboy” 16oz cans can be used. Fruity beers and sours also bring great flavors to beer can chickens. You can even use darker, sweeter beers like Dunkel or porter for a more malty, dark winter flavor. Besure to use a sweeter rub that will pair better with the darker, maltier beers.
No special equipment is needed. While it is easier to keep the chicken upright with the beer can in the cavity with special equipment like a beer can chicken holder, you don’t really need one. I like to use a #6 or #8 cast iron pan, because they’re generally small enough to hold the chicken upright and are safe to use on a gas or charcoal grill or smoker.
Make Ahead Tips
Rub and refrigerate: Apply the dry rub to the chicken, cover with plastic wrap, and refrigerate up to 24 hours. The rub penetrates deeper overnight — this is actually the best way to do it.
Rub only: Mix the dry rub up to 2 weeks ahead and store in an airtight jar. Season right before cooking.
Beer Can Chicken Leftover Ideas
Beer can chicken tacos: shred leftover meat, toss with a squeeze of lime, serve in warm tortillas with avocado and slaw
Chicken soup: simmer the carcass with onion, celery, and carrots for 2 hours to make stock, add egg noodles or rice
Chicken salad: chop cold leftovers with mayo, Dijon, celery, and fresh dill
Grain bowls: slice over rice or farro with roasted vegetables and your favorite dressing
Beercan Chicken Recipe FAQs:
350–375°F using indirect heat. This temperature range ensures the skin crisps up without burning before the interior reaches a safe 165°F at the thigh joint.
Plan on 60–90 minutes for a 4–5 pound bird at 350–375°F. Use an instant-read thermometer — the exact time varies with grill temperature and the size of the chicken.
Beer can chicken cooked with traditional beer is not gluten free, as many mass produced lagers contain gluten. You can use gluten-free beer to make this recipe gluten-free.
Honestly, the flavor impact is subtle — most of the alcohol and hop compounds cook off. The real magic is the steam, which keeps the interior incredibly moist. Use a beer you’d enjoy drinking, but don’t agonize over the brand.
Yes! The oven method above works beautifully. You won’t get the smoke from a grill, but the technique – vertical roasting with internal steam – is identical and produces the same crispy-skin, juicy interior results.
What to serve with Beer Can Chicken
Classic coleslaw – the cool crunch is perfect against smoky chicken
Grilled corn on the cob – throw it on the grill while the chicken cooks
Baked beans – a backyard cookout staple
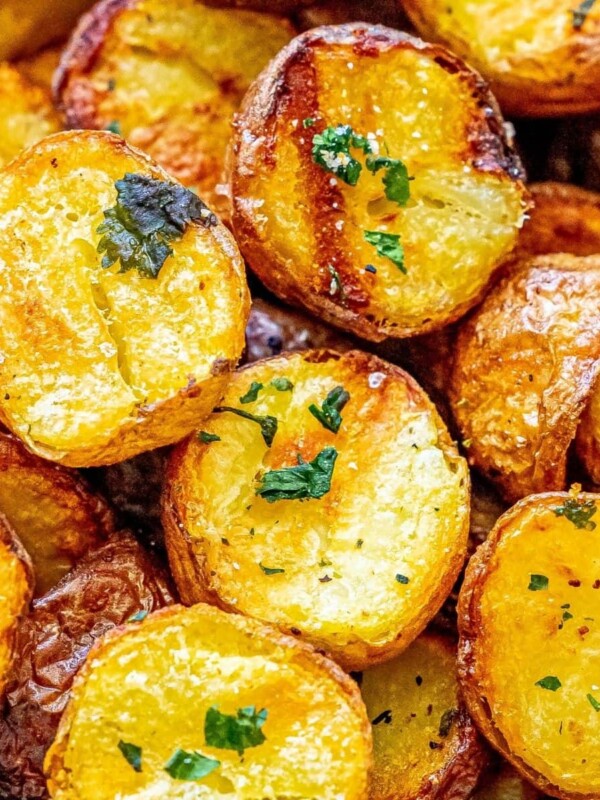
Grilled potatoes – crispy edges, pillowy centers (see our Crispy Grilled Potatoes recipe)
Watermelon feta salad – refreshing contrast to the rich, smoky bird
If you love this easy recipe please click the stars below to give it a five star rating and leave a comment! Please also help me share on Instagram, Facebook, and Pinterest!
Share on Facebook
SharePin this now to find it later
Pin ItFollow on Instagram
Only have 30 minutes to get dinner on the table? Sign up for my 30 minute dinner plans direct to your inbox!
Find and shop my favorite products in my Amazon storefront here!
Beer Can Chicken
Equipment
Ingredients
- One whole roaster chicken
- 1 can beer
- 2 tablespoons chicken rub
- Salt and Pepper, to taste
- 1 lemon, for armoa
Instructions
- Remove your chicken from the packaging and pat dry with a paper towel. Check the body cavity for a package with the giblets or the neck. Discard these parts, unless you’re planning to make chicken stock.
- Open your can of beer and pour ¼ to ½ of the can into a cup.
- Using a sharp knife, kitchen shears, or a can cutter, carefully cut open the top of your can. Once the top has been cut open, I put 2-3 slices of lemon and a couple of cloves of garlic in the can, and a dash or two of your chicken rub.
- There are beer-can chicken holders available, but for this cook I didn’t use any special equipment, just using an 8” cast iron skillet.
- Place the opened can of beer in the middle of the cast iron skillet, then gently place the chicken over the can in the large cavity opening. The bird should sit upright over the can.
- Once the chicken is in place, spray with cooking oil, and then season the chicken with your rub of choice.
- I cooked my chicken on our Kamado-style grill, heated to 350-375o F, with a few chunks of oak added to the charcoal for some smoke flavor to the chicken.
- Approximately every 20-30 minutes, spritz the chicken with a mixture of the leftover beer with some water added to thin it out.
- The chicken is done when it reaches an internal temperature of 165o F.
- Allow your chicken to rest for 15-20 minutes to keep the meat moist.
- Remove from the cast iron skillet after the rest, and carve your chicken into individual cuts.
- Enjoy hot, or cold at a picnic or backyard BBQ!
Video
Notes
Nutrition
Nutrition information is automatically calculated, so should only be used as an approximation.