This post contains affiliate links. Please read our disclosure policy.
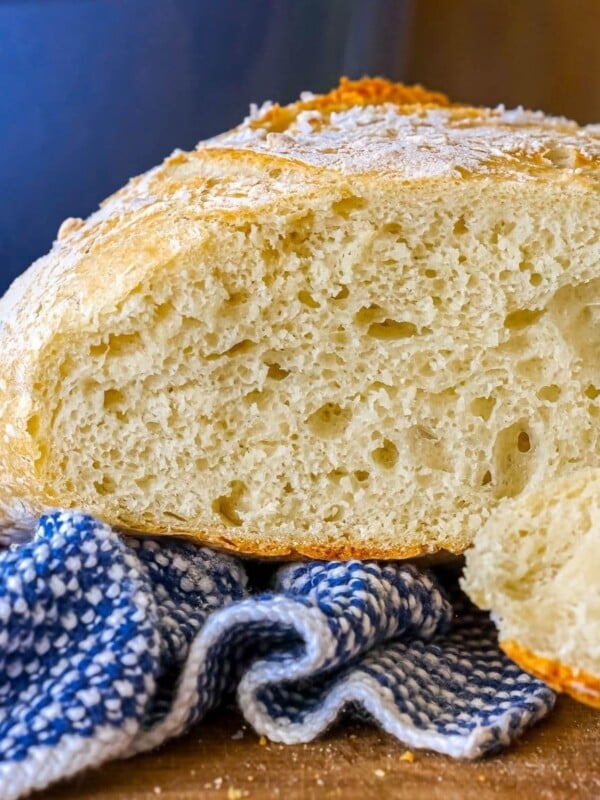
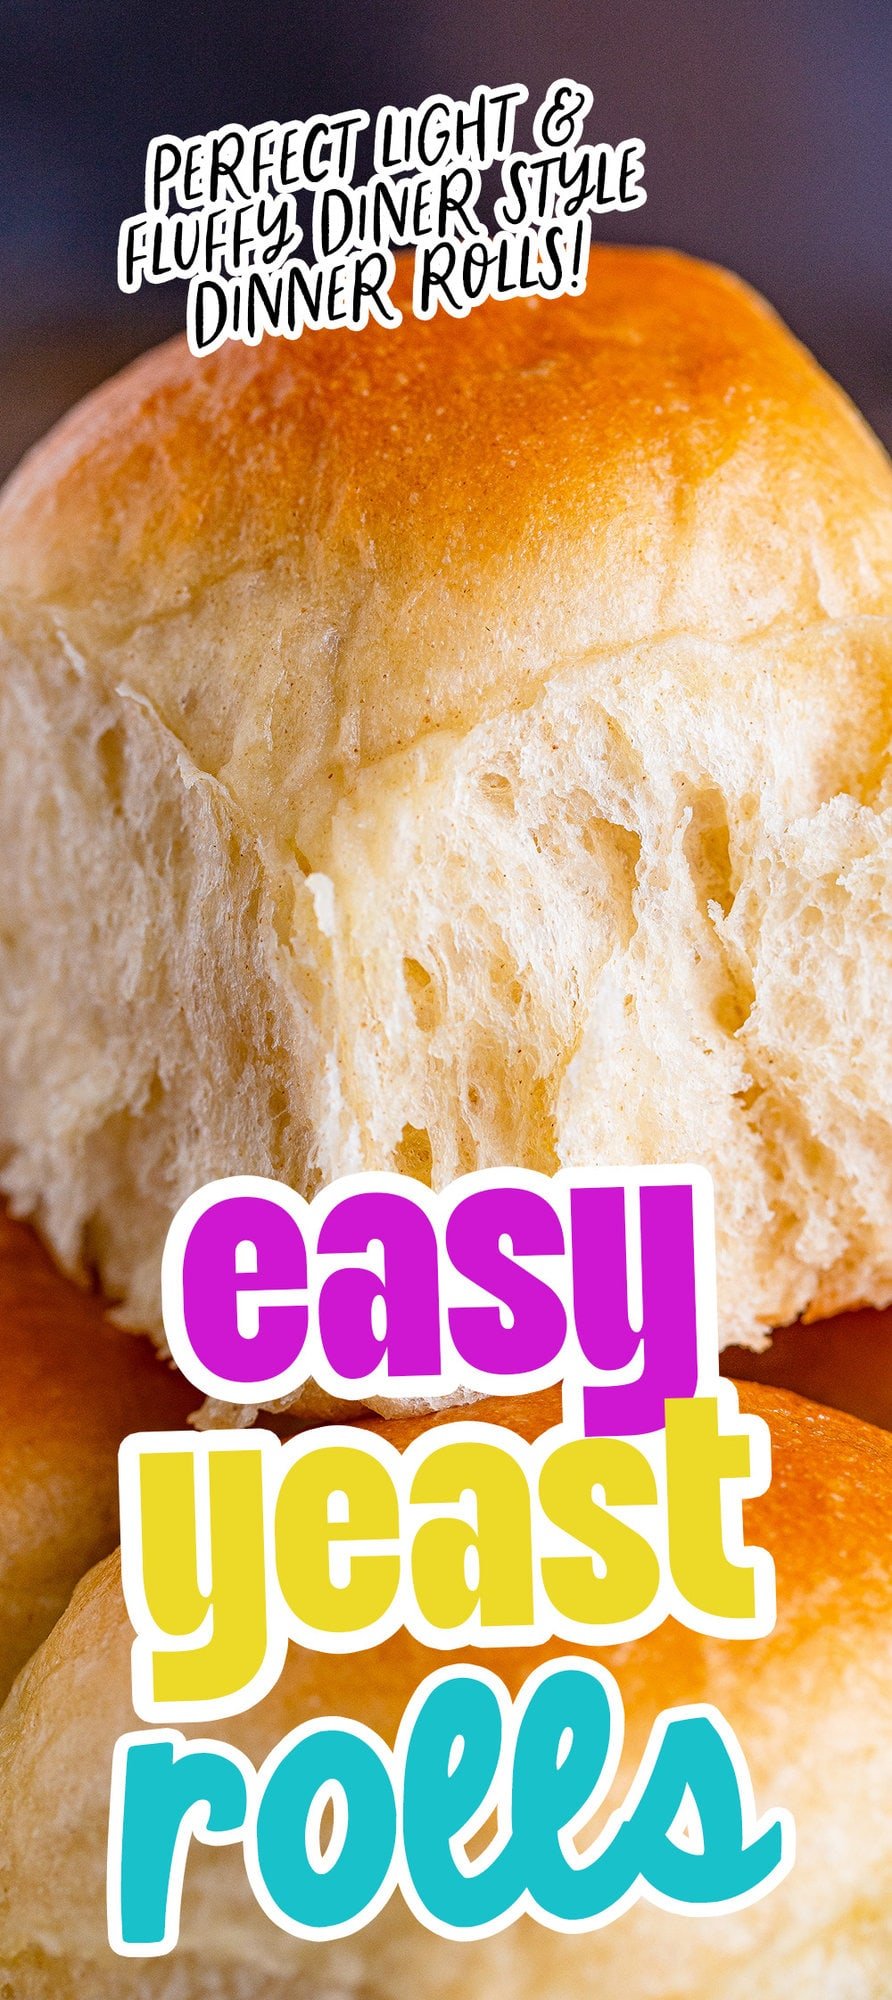
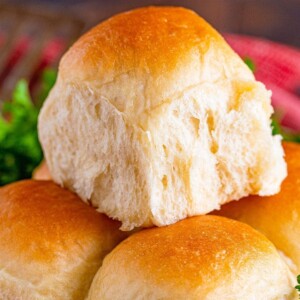
I love diner rolls… the light, fluffy rolls from late-night diners I used to spend a lot of time at in my 20’s and these Homemade Yeast Rolls is my absolute favorite. I can never get enough of these rolls, they takes me right back to those amazing diner rolls, and they are easy to make at home!
Serve these rolls with Easy Bacon Butter Spread, or with Perfect Spatchcocked Turkey, Perfect Creamy Mashed Potatoes, and Classic Green Bean Casserole for Thanksgiving, or with The Best Easy Prime Rib, Perfectly Broiled Lobster Tails, and The Best French Onion Soup for Christmas!


Don’t want all the extras in a recipe post? We provide a skip to recipe button in the top left corner, as well as a clickable table of contents, just below, to help make this page easier to navigate.
At Sweet C’s, I add lots of tips in all of my recipes – because I am a home cook without any formal training, and I find I am more confident making dishes when I understand why it works, and what each ingredient means to the flavor of a recipe. My goal is for even the most beginner home cook to feel empowered in the kitchen.
Table of Contents
How to Make Yeast Rolls
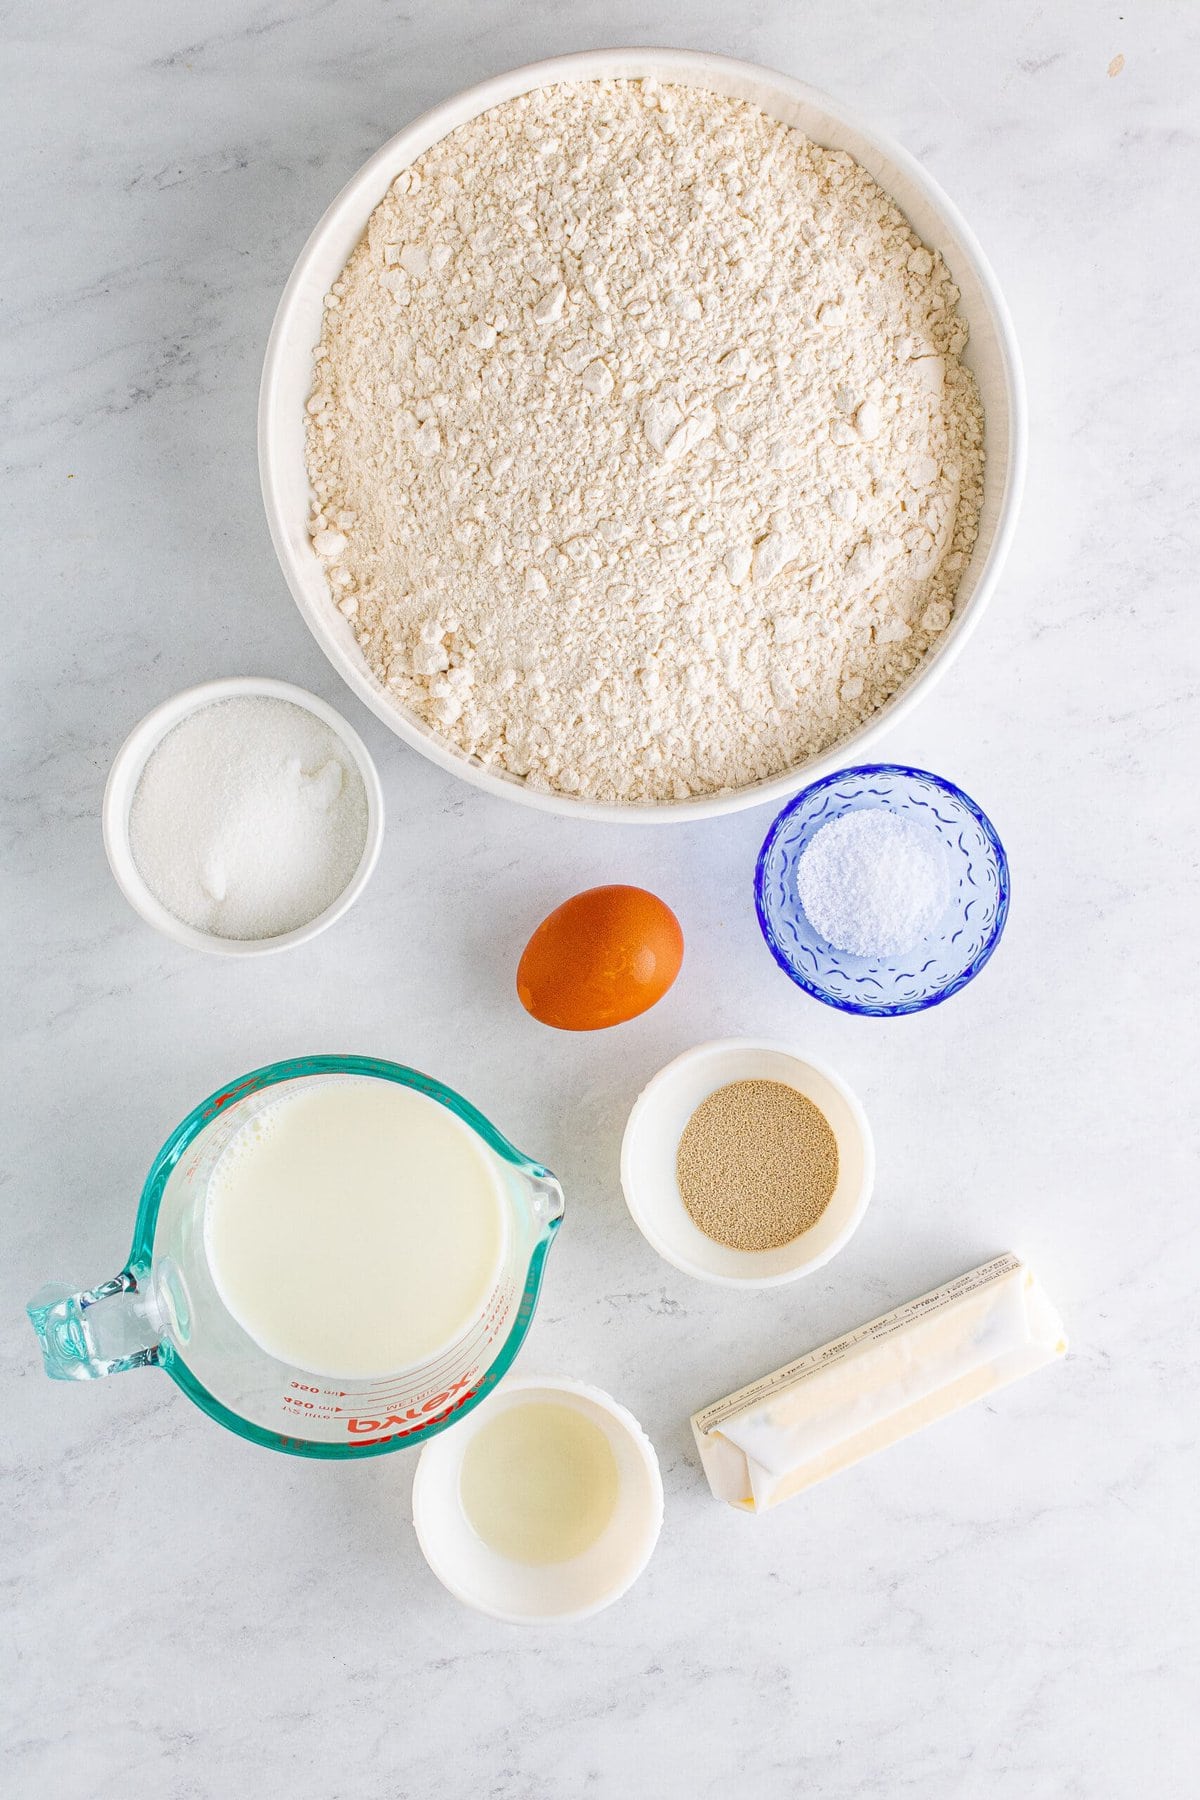
To make this recipe, we will need:
- Unsalted Butter. Butter gives us a perfect fat content for rolls, allowing the rolls to be light and flaky, with a rich and creamy flavor that is classically comforting.
- Granulated sugar. Granulated sugar gives a touch of sweetness to dinner rolls without making them too sugary – that iconic diner roll flavor that is just a touch sweet is from a bit of plain white sugar!
- Kosher salt. Kosher salt has a perfect salty flavor and light crunch, without additional sodium like table salt, making it perfect for baking.
- Whole milk. For this recipe, we’re relying on the fat content in whole milk and butter to provide a perfect base for bread dough that won’t dry out, and instead give a perfect, moist crumb.
- Active dry yeast. Since we’re relying on yeast to make these rolls, using the right kind of yeast is critical to get the proper lift, so your rolls are light, airy, and soft. Opt for active dry yeast to get perfectly puffy, never dense yeast rolls.
- Egg. To give our rolls a bakery-style perfect shine, we’re giving them an egg wash – this helps the top develop a lovely caramelized brown hue and picture-perfect glisten!
- All-purpose flour. As these rolls rely on yeast for their lift, all purpose flour is perfect for this recipe. Self rising flour will rise too much, and bread flour’s gluten profile will be off.
- Vegetable oil. Vegetable oil is just used in this recipe to keep your dough from sticking to the bowl as it rises – you can swap for another oil if you prefer (go for something with a neutral flavor profile – olive oil might have too much of a flavor unless you use an incredibly mild olive oil.)
Use this Method
Prep
Assemble all the ingredients.

Slice Butter
Take half of the butter and slice it as thin as you can, add the slices to the bottom of a stand mixer. Add the sugar and salt to the mixer.

Add warm Milk
Warm the milk in a microwave safe bowl in the microwave. I like to do this in 15 second intervals. Temp the milk, it should be 105-110°F (do not warm to over 110°F). Pour 1 cup of the warm milk into the bowl with the butter, no need to stir, just let it sit.

Yeast
Add the yeast to the remaining milk and give it a stir. Let it sit for about 5 minutes, until foamy. Add this mixture to the mixer. Add in the egg and stir everything to combine.

Knead
Using the hook attachment, start stirring in the flour 1 cup at a time, scrape down the sides as needed. Do this until you add 3 & ½ cups of flour. Once the mixture resembles a dough, turn the speed to medium-high and start to knead it. Knead for 3 minutes.

Rise
In a large bowl, add the vegetable oil. Take the dough out of the mixer and add it to the bowl with the oil, turn it around in the oil so it is coated. Cover with plastic wrap and let it rise in a warm place for 1-2 hours until doubled in size.

Prep Dish
Melt the remaining ¼ cup of butter. Brush a 9×13 baking dish with some of the butter, you will only need a small amount, set aside.

Punch
Punch down the dough to release the air bubbles. Divide the dough into 15 sections. I like to weigh the dough then divide by 15 to see how many ounces each roll should be.

Form Rolls
Take each dough ball with your hands and stretch it out, tuck the ends of the dough around itself to form a smooth ball and pinch the seams together, gently roll it between your hands to form a ball.

Arrange Rolls
Place the ball seam side down into the prepared baking dish, 5 rows of 3 rolls. Cover again with plastic wrap and let them double in size, about 1 hour.

Bake
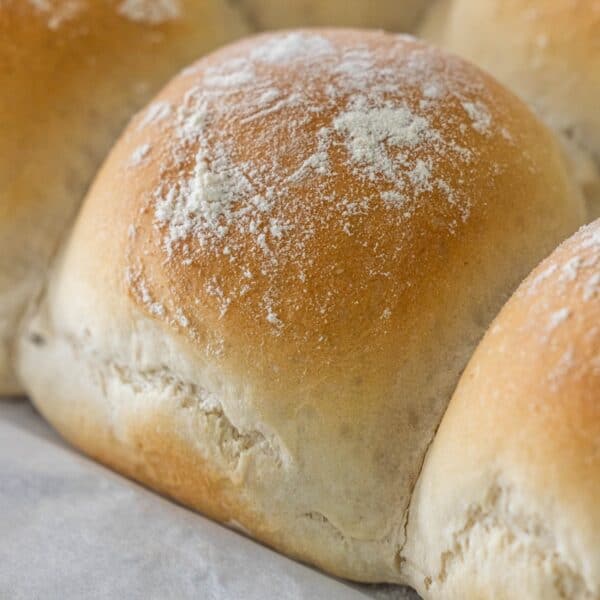
Preheat the oven to 350°F. Take the plastic wrap off the baking dish and insert a probe thermometer into the side of the center roll. Bake for 20-25 minutes until the tops are golden brown and the internal probe registers 190 degrees F. You may need to add a tin foil tent 20 minutes in to keep the tops from getting too brown.

Butter and Enjoy
Immediately brush the rest of the butter all over the hot rolls. Let cool and serve.
Tips for making the perfect Recipe for Yeast Rolls
Light and fluffy, super buttery rolls, simply the best alongside any meal! Follow these tips for a very slightly sweet, perfect dinner roll.
Don’t have a mixer? Do it by hand. You can also stir/knead the dough by hand, you will need more flour to keep your work surface floured. Do steps 1-3 the same way except use a large bowl instead of a stand mixer. Stir the flour in with a wooden spoon until a dough is formed. Then, place the dough on a clean floured work surface and knead the dough by hand for about 3-4 minutes until it is smooth. Go on to the next steps as stated.
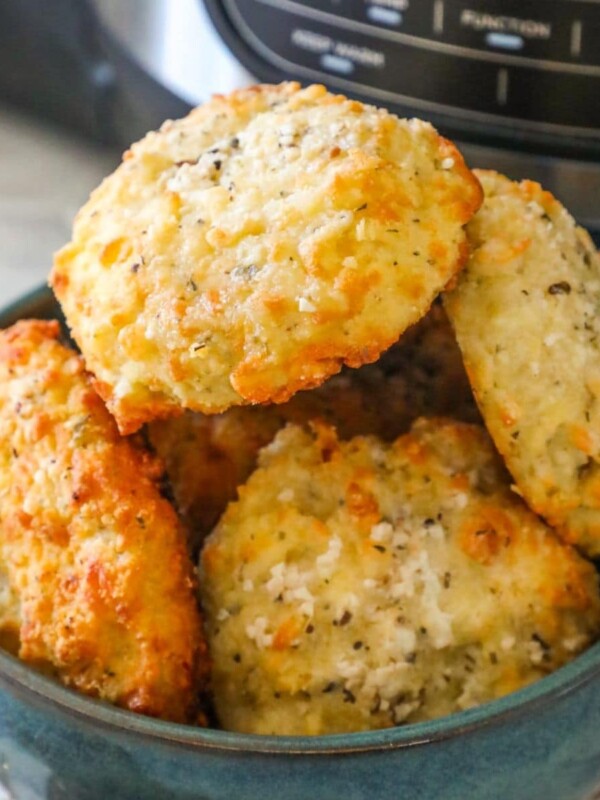
Add more flavor! You can add seasoning, cheese, chopped jalapenos, and more directly into the dough before kneading to mix up the flavors!
Make them ahead. Keep any leftovers in an airtight container on the counter for up to 5 days. These freeze beautifully and defrost in the fridge overnight. Warm them for a few minutes in the oven.
Homemade Yeast Rolls Recipe FAQs
Bake yeas rolls in a well preheated oven set to 350 degrees Fahrenheit.
Rolls take about 20-25 minutes to bake.
Rolls are done when they are light, airy, and browned on top and sides.
You can store yeast rolls in an airtight container or bread bin for up to five days in a cool, dry place.
Other Side Dishes You’ll Love
If you’re planning a dinner party and looking for other delicious, easy side dishes, find the rest of our easy side dish recipes.
Some of our favorites, like Crispy Roasted Potatoes, Garlic Butter Sausage and Mushroom Stuffing, The Best Easy No Knead Bread, Easy Roasted Beets and Sweets, Mini Sweet Potato Pies, Easy Baked Tomato Pie, and The Best Easy Whole Roasted Cauliflower make for knockout holiday dinner side dishes.
For more delicious easy sides, check out some of our favorite recent recipes below:

You can find the rest of our favorite easy side dishes here.
If you love this easy recipe please click the stars below to give it a five star rating and leave a comment! Please also help me share on Instagram, Facebook, and Pinterest!
Share on Facebook
SharePin this now to find it later
Pin ItFollow on Instagram
Only have 30 minutes to get dinner on the table? Sign up for my 30 minute dinner plans direct to your inbox!
Find and shop my favorite products in my Amazon storefront here!
Yeast Roll Recipe
Equipment
- USA Pan Bakeware Rectangular Cake Pan, 9 x 13 inch, Nonstick & Quick Release Coating, Made in the USA from Aluminized Steel
Ingredients
- ½ cup unsalted butter, divided
- ¼ cup granulated sugar
- 1 teaspoon kosher salt
- 1 ¼ cup whole milk, divided
- 2 ¼ tsp active dry yeast
- 1 large egg, beaten
- 3 ½ cups all-purpose flour, you may need as much as 4 cups if your dough is too loose.
- 1 teaspoon vegetable oil
Instructions
- Take half of the butter and slice it as thin as you can, add the slices to the bottom of a stand mixer. Add the sugar and salt to the mixer.
- Warm the milk in a microwave safe bowl in the microwave. I like to do this in 15 second intervals. Temp the milk, it should be 105-110°F (do not warm to over 110°F). Pour 1 cup of the warm milk into the bowl with the butter, no need to stir, just let it sit.
- Add the yeast to the remaining milk and give it a stir. Let it sit for about 5 minutes, until foamy. Add this mixture to the mixer. Add in the egg and stir everything to combine.
- Using the hook attachment, start stirring in the flour 1 cup at a time, scrape down the sides as needed. Do this until you add 3 & ½ cups of flour. Once the mixture resembles a dough, turn the speed to medium-high and start to knead it. If it doesn’t start to clean the sides of the bowl, add a little flour at a time (up to a half cup) until the sides of the bowl are clean, if the dough is still attached at the very bottom of the bowl that’s okay. Knead for 3 minutes.
- In a large bowl, add the vegetable oil. Take the dough out of the mixer and add it to the bowl with the oil, turn it around in the oil so it is coated. Cover with plastic wrap and let it rise in a warm place for 1-2 hours until doubled in size.
- Melt the remaining ¼ cup of butter. Brush a 9×13 baking dish with some of the butter, you will only need a small amount, set aside.
- Punch down the dough to release the air bubbles. Divide the dough into 15 sections. I like to weigh the dough then divide by 15 to see how many ounces each roll should be.
- Take each dough ball with your hands and stretch it out, tuck the ends of the dough around itself to form a smooth ball and pinch the seams together, gently roll it between your hands to form a ball. Place the ball seam side down into the prepared baking dish, 5 rows of 3 rolls. Cover again with plastic wrap and let them double in size, about 1 hour.
- Preheat the oven to 350°F. Take the plastic wrap off the baking dish and insert a probe thermometer into the side of the center roll. Bake for 20-25 minutes until the tops are golden brown and the internal probe registers 190 degrees F. You may need to add a tin foil tent 20 minutes in to keep the tops from getting too brown. Immediately brush the tops with butter and enjoy!
Video
Nutrition
Nutrition information is automatically calculated, so should only be used as an approximation.


Great rolls; even greater instructions for a newbie to yeast baking like me. Thank you! I’ll make them again and again.